🏷️ Custom field types
🧭 Beyond widget placements, RoboREST lets you register custom user field types for Bitrix24. After registration, the type appears in CRM like any other field type when you add a field — for example on a deal card. You can build dependent fields (one choice drives another list), button panels that run actions such as starting business processes, and other custom UI inside the card.
🧩 Widget and URL placement
📍 First create the widget that will render when the field is shown. For placement, choose the URL option (the UI shows the current choice, e.g. “Current: URL”). Below the placement block you will see the widget URL — copy it; you will use it as the Handler URL in the next step.

🟢 On the widget page, click Custom field types to open the custom field type registration screen.
📝 Registering the field type
✏️ On the Bitrix24 custom field types page, fill in the form:
• Type code — a unique type identifier (letters and digits, as prompted in the UI).
• Handler URL — the widget URL from step 1.
• Type name — the label shown in the admin UI.
📎 Optionally set a description and field height in pixels (0 usually means default height).
• Type code — a unique type identifier (letters and digits, as prompted in the UI).
• Handler URL — the widget URL from step 1.
• Type name — the label shown in the admin UI.
📎 Optionally set a description and field height in pixels (0 usually means default height).
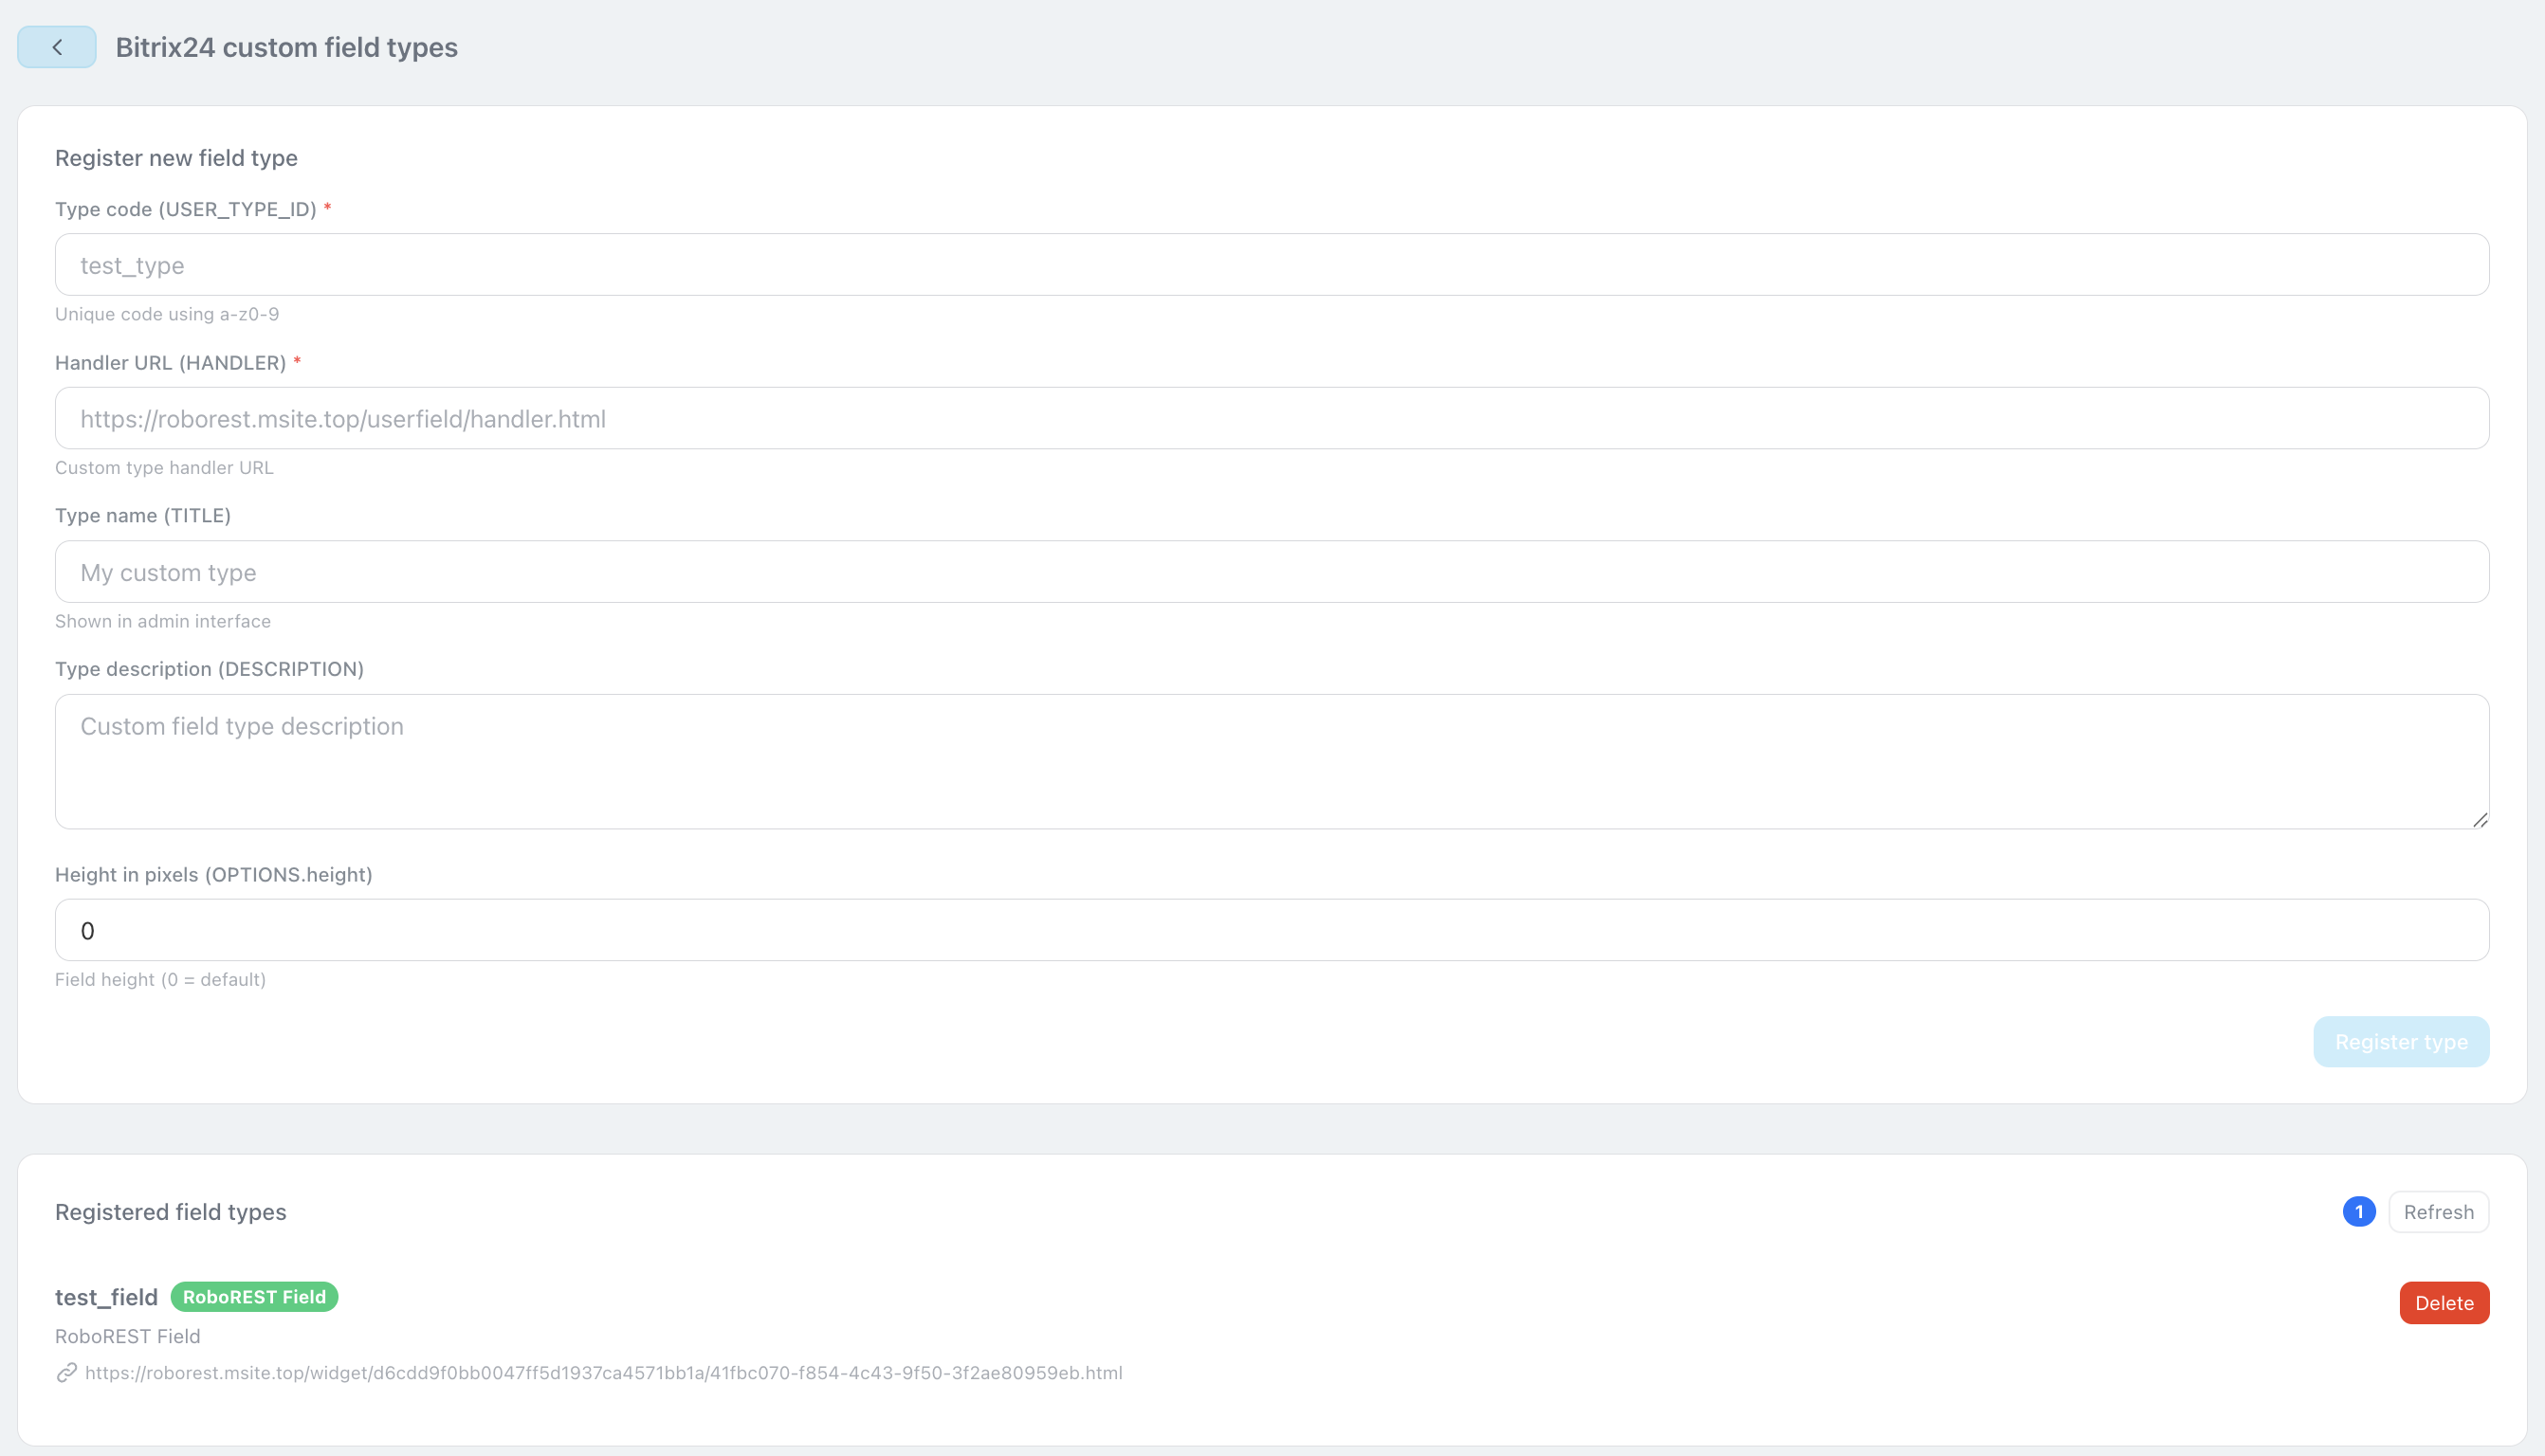
✅ Click Register type. Below, the list shows types you already registered; use Refresh to reload the list or Delete to remove a type.
💼 Field on the CRM card
🔗 Open a deal card (or another CRM entity where you need the field) and add a new field using the standard CRM tools, selecting your registered custom type. After saving, the card will show your widget for that field.