🧩 Widgets
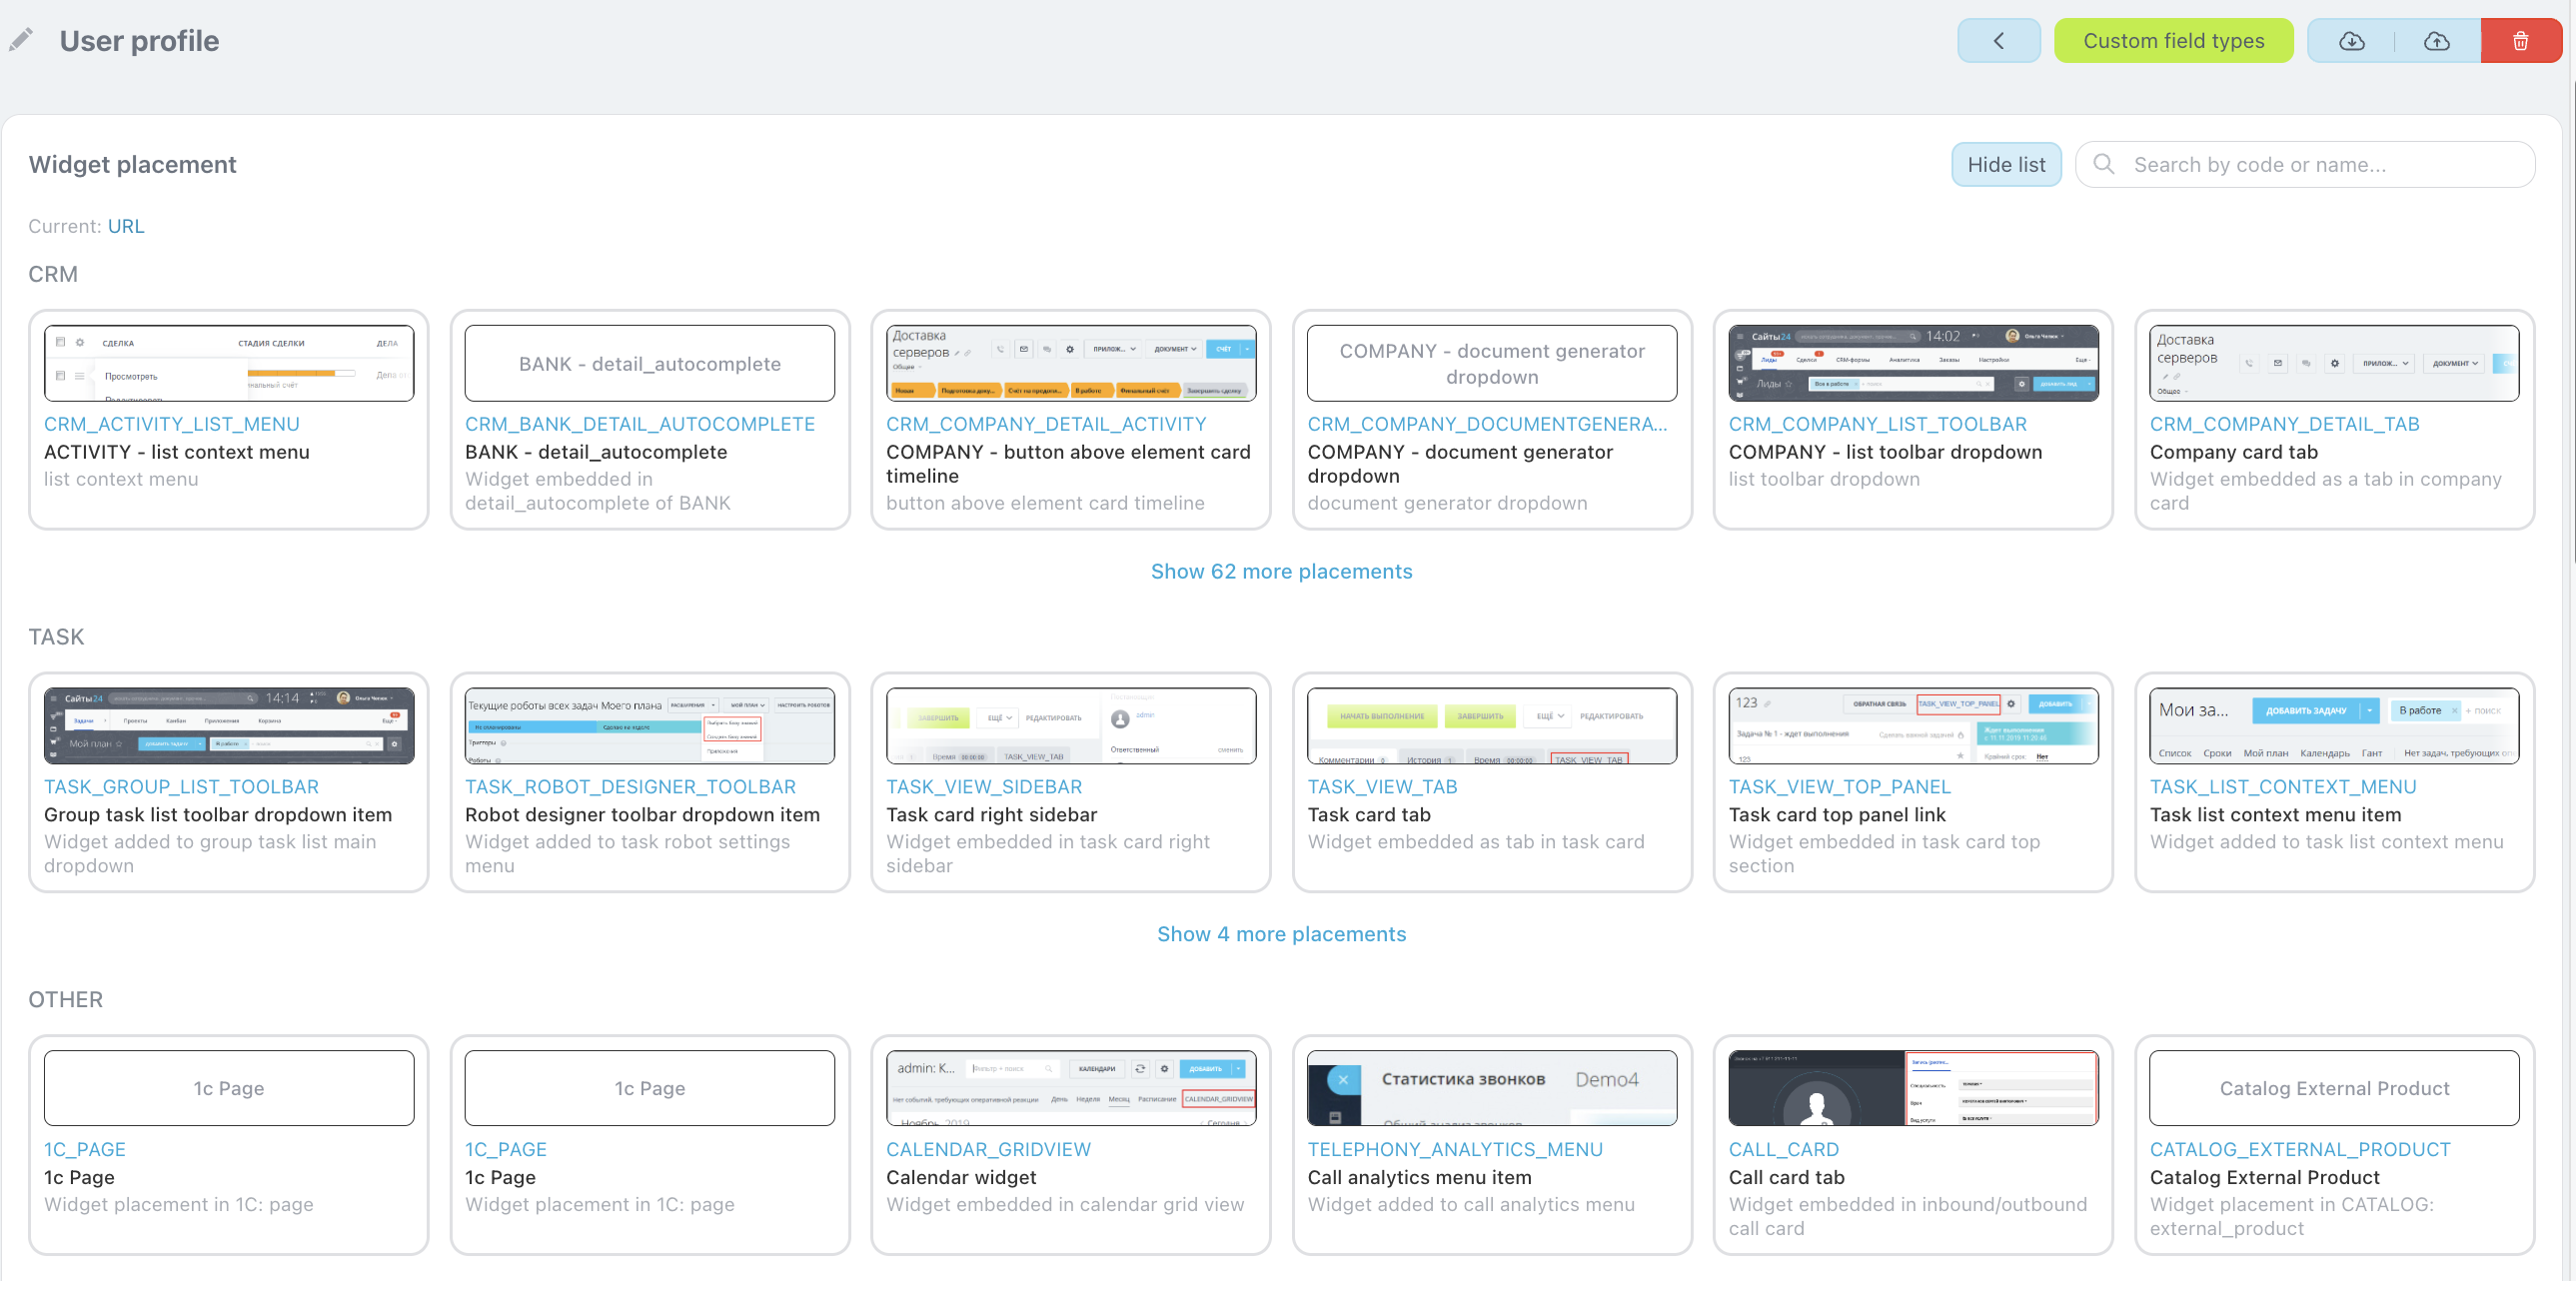
Bitrix24 offers roughly a hundred widget placements so you can extend the portal beyond its built-in features. For example, in a user profile you can show gamification tools or work activity metrics. In CRM cards — custom shopping carts or company reports. In tasks — time spent broken down by departments and employees who worked on the task. In the calendar — your own layout for events. In the call card — a script the manager should follow, or products and services to suggest to the customer based on the current call. Finally, from the portal main menu you can open a standalone page with anything from reports to a casual game for colleagues.
➕ Creating a widget
The easiest start is the Examples tab: you quickly see how widget code should look, how to read placement information from it, and how to call your portal’s REST API methods. Or build from scratch — click Add widget.
🔎 Choosing a placement
On the widget creation screen, the first step is to pick a placement. Each option shows an image of where and how the widget will appear, plus a title, code, and description. Use search by title, code, or description to find the right placement faster.
🧑💻 Code editor and testing
After you choose a placement, a code editor opens — similar in power to Visual Studio Code: syntax highlighting for HTML, CSS, and JavaScript, plus inline hints. On the right is the testing pane: it renders the widget the way it will look in the selected placement. The preview updates in real time as you edit the code.
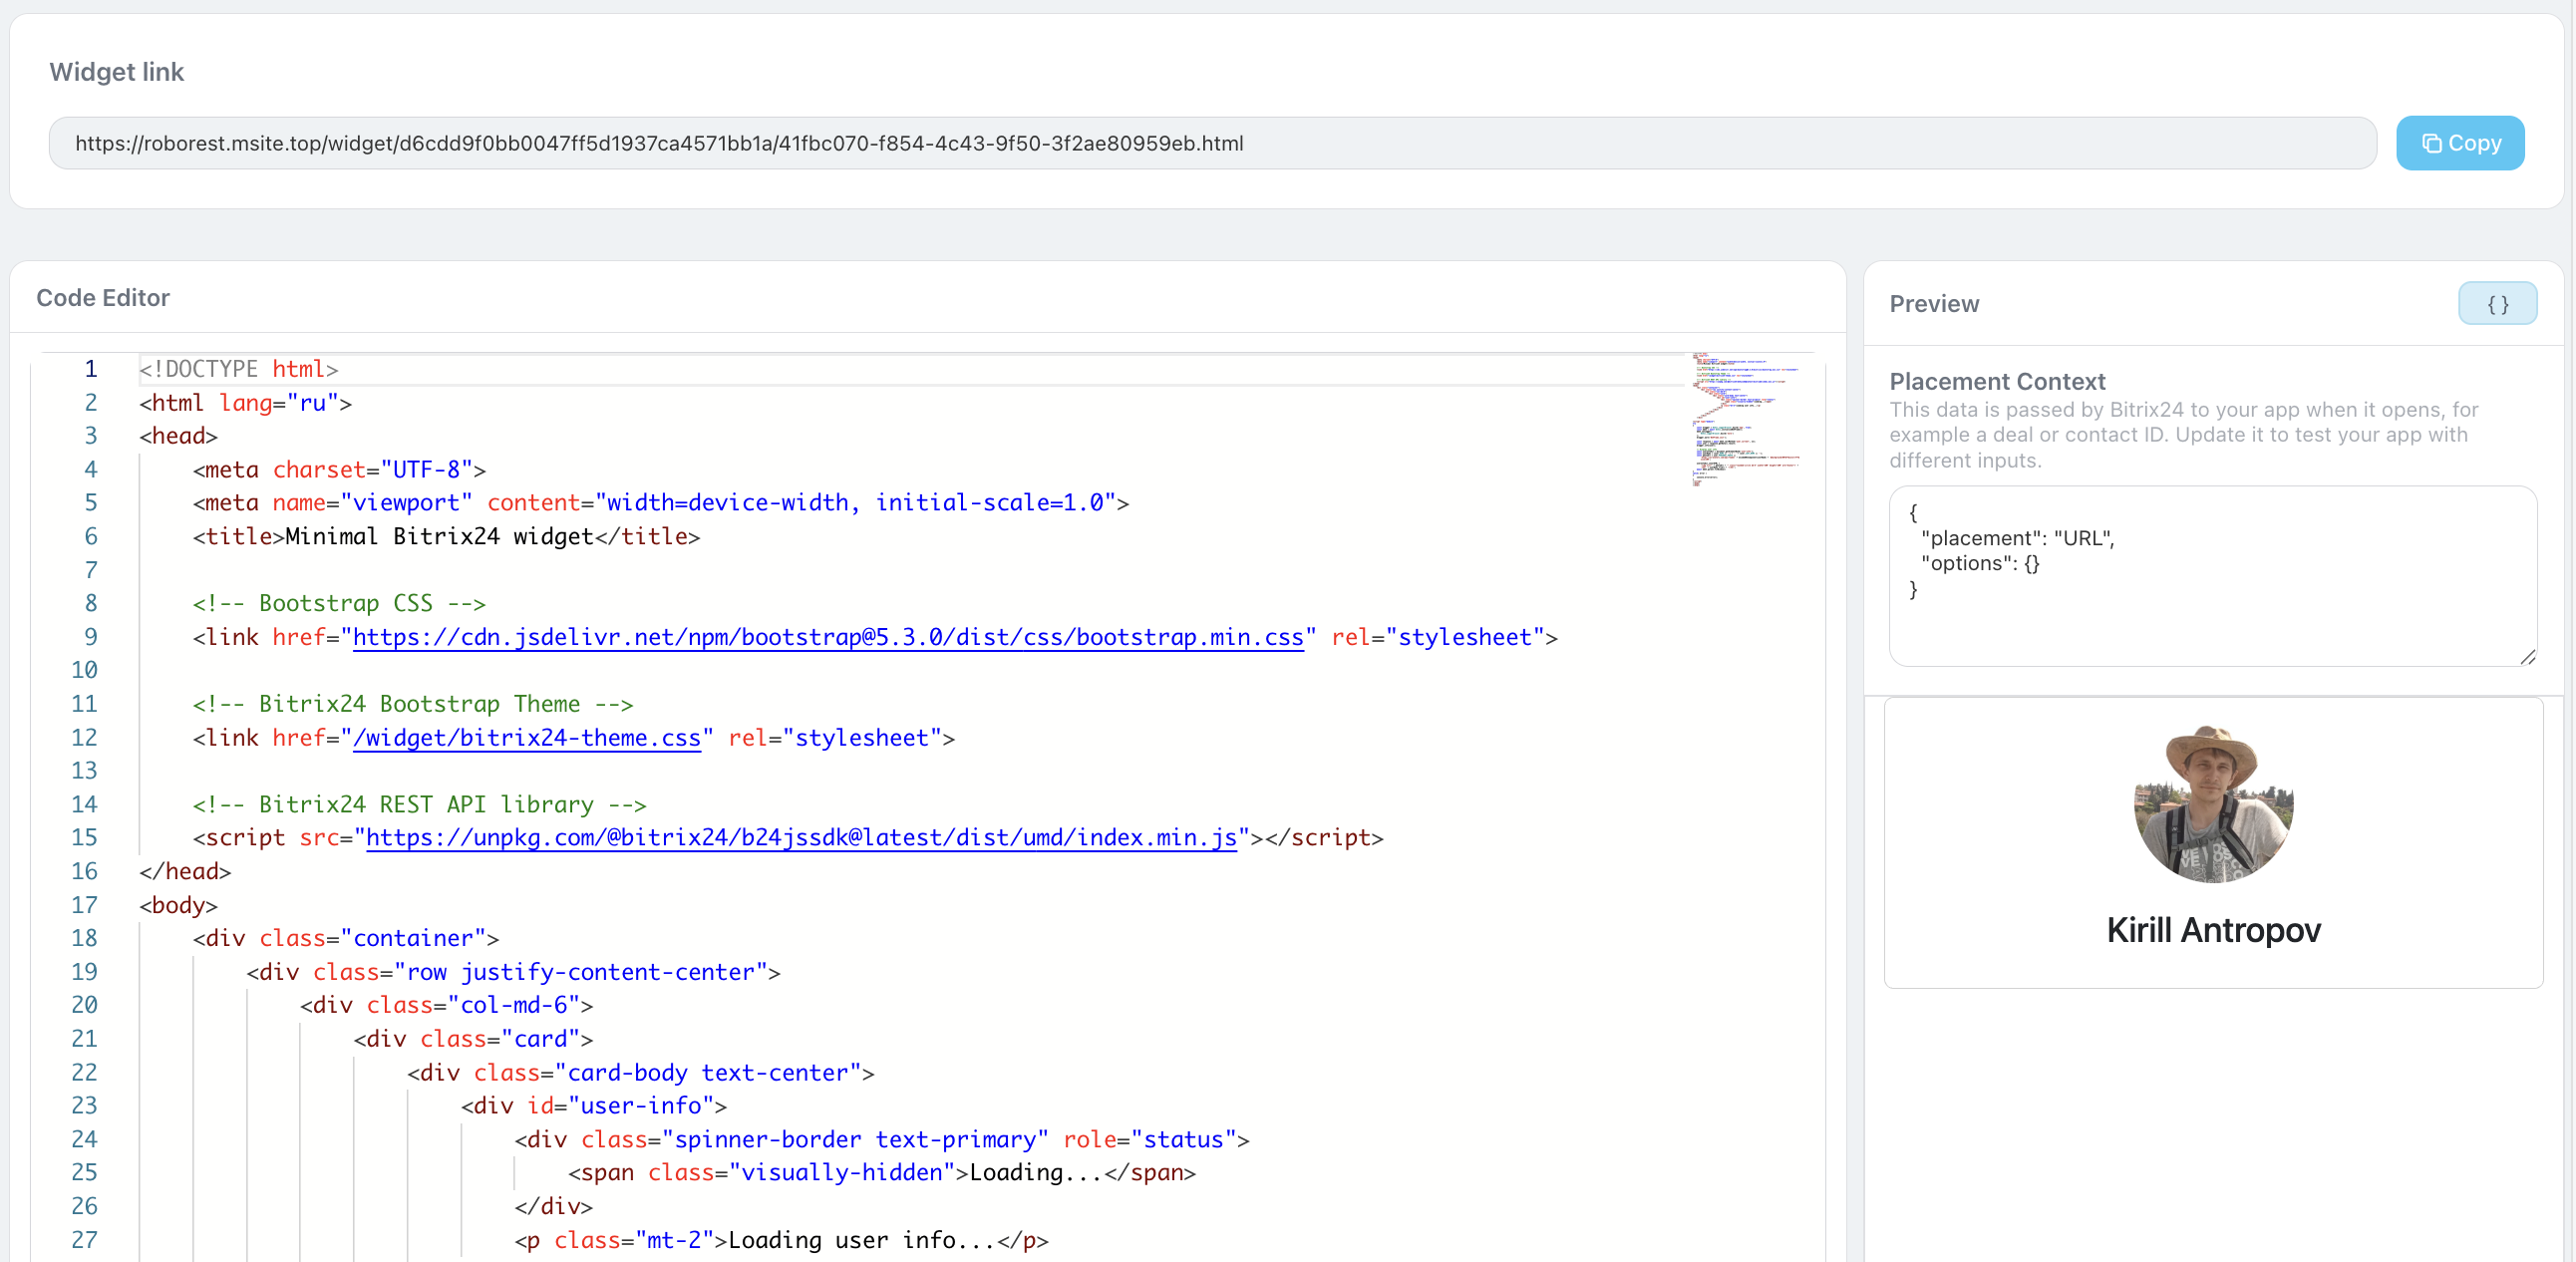
Above the testing pane you can configure Placement Context. That matters when the widget targets a deal card, for example: to verify behavior, the preview should believe it was opened from a specific test deal. In Placement Context you set the identifiers you need (such as a deal ID).
💾 Saving
✅ When the widget is ready and tested, give it a name and save. After that it appears in the placement you selected.